Mining Guide for RecordsKeeper Blockchain on Windows
The following document helps the users to initiate mining the RecordsKeeper blockchain using a Windows Operating system. All the commands and processes displayed in this document have been tested and created using Windows 7 and above operating systems. A detailed overview to start mining the RecordsKeeper blockchain is as follows:
- System Requirements
- Installing RecordsKeeper on Windows
- Connecting to RecordsKeeper Blockchain on Windows
- Mining Permissions
- Connecting to RecordsKeeper Blockchain after Permissions
- Stopping RecordsKeeper Blockchain
System Requirements
- Windows: 64-bit, supports Windows 7, 8, 10, Server 2008 or later.
- 512 MB of RAM
- 1 GB of disk space
Installing RecordsKeeper on Windows
Download the executables from here and then unzip the folder and you will have the binary files: rkd.exe, rkd-cold.exe, rk-cli.exe and rk-util.exe.
Copy the folder to your desired location.
Then, open your command line terminal and go to that location. After that run the following command:
cd recordskeeper-windows-1.0.0
Note
Windows users move directly to the connecting-rk section.
Connecting to RecordsKeeper Blockchain on Windows
The RecordsKeeper Testnet blockchain is avaialble for users to develop and deploy applications on the RecordsKeeper blockchain. XRK Testnet tokens do not hold any value and are only available for testing. You can earn XRK tokens from RecordsKeeper Mainnet mining.
Now, to connect to the RecordsKeeper blockchain, first go into the directory where you have downloaded “recordskeeper-windows-1.0.0.zip” and then open the command line terminal from that location:
RecordsKeeper Testnet
rkd recordskeeper-test@35.170.155.89:8379
RecordsKeeper Mainnet
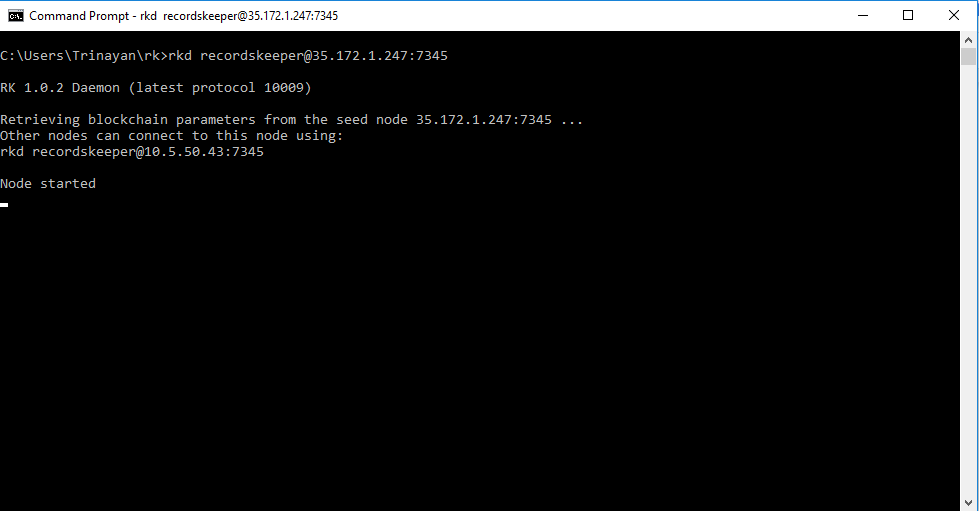
rkd recordskeeper@35.172.1.247:7895
This command will initialize your node.
And, if you want your connection to remain active as a background process, then run this command:
RecordsKeeper Testnet
rkd recordskeeper-test@35.170.155.89:8379 -daemon
RecordsKeeper Mainnet
rkd recordskeeper@35.172.1.247:7895 -daemon
If the operating system does not pop up the allow firewall connections for rkd like shown below:
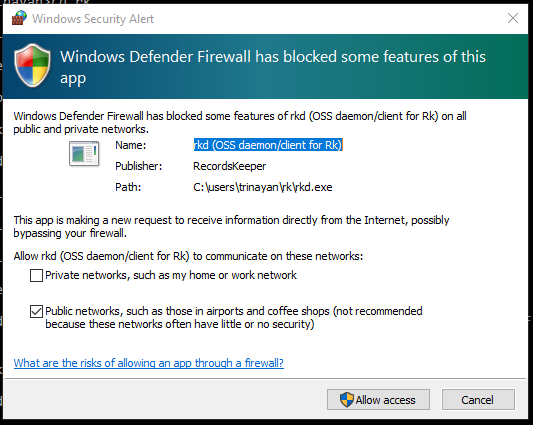
Then, you have to manually allow connections through your firewall by following the steps below:
Go to:
Control Panel > System and Security > Windows Defender Firewall > Advanced Settings
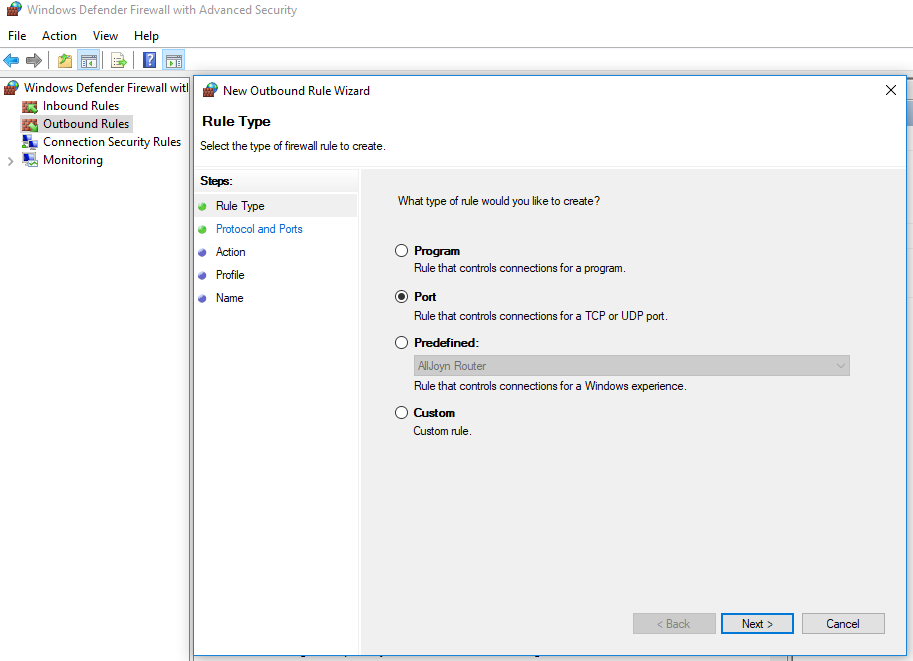
And add Outbound Rules by following these steps:
Step 1: First select the rule type. As you have to create a rule for allowing the network port, select Port here and then press Next:
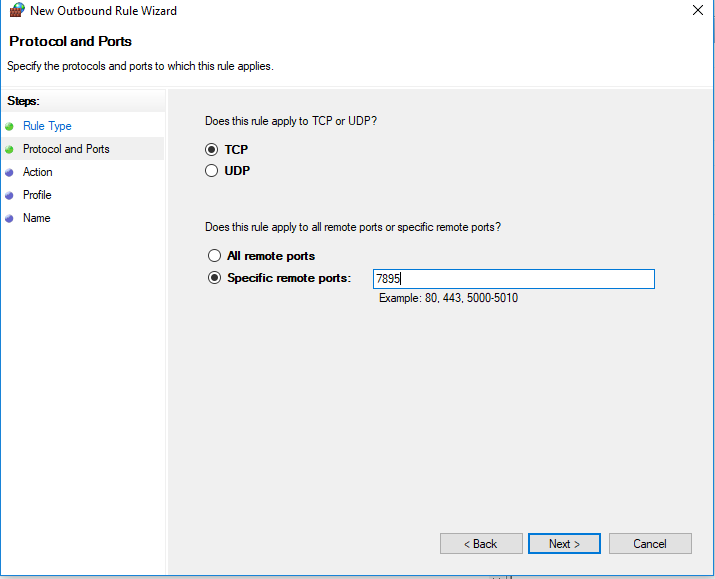
Step 2: Specify the port address of the RecordsKeeper blockchain to which you are allowing access, for Testnet type 8379 and to open ports for Mainnet type 7895 in the textbox, and then click on Next:
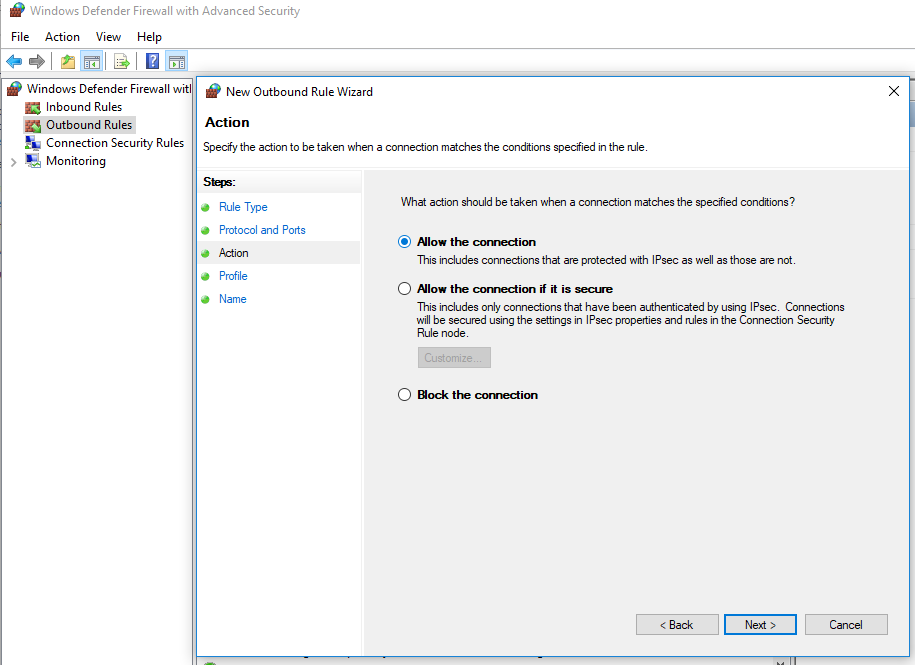
Step 3: Now click on Allow the connection and then press Next:
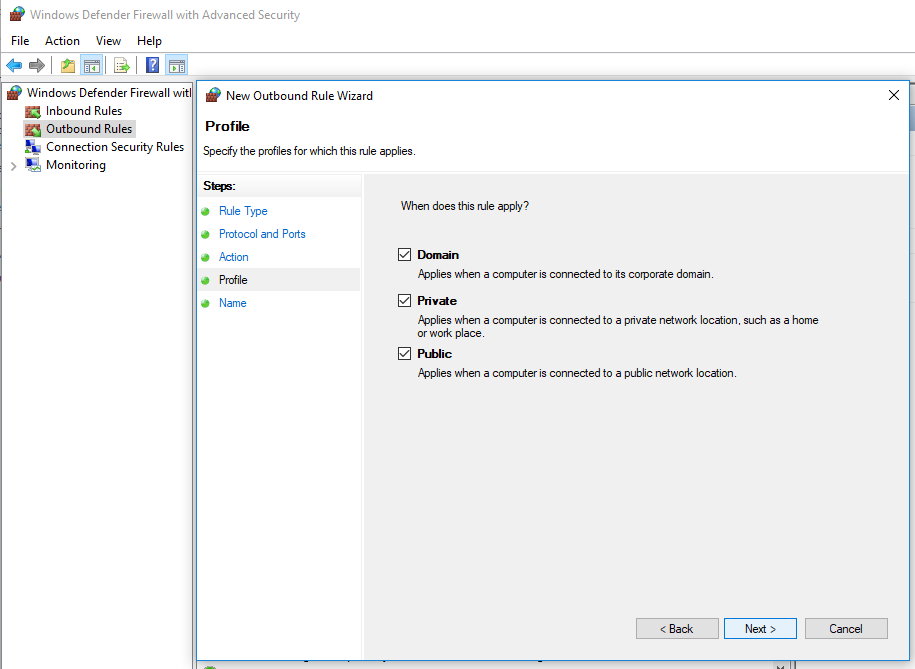
Step 4: Select all three profiles here for the rule to apply, and then click on Next:
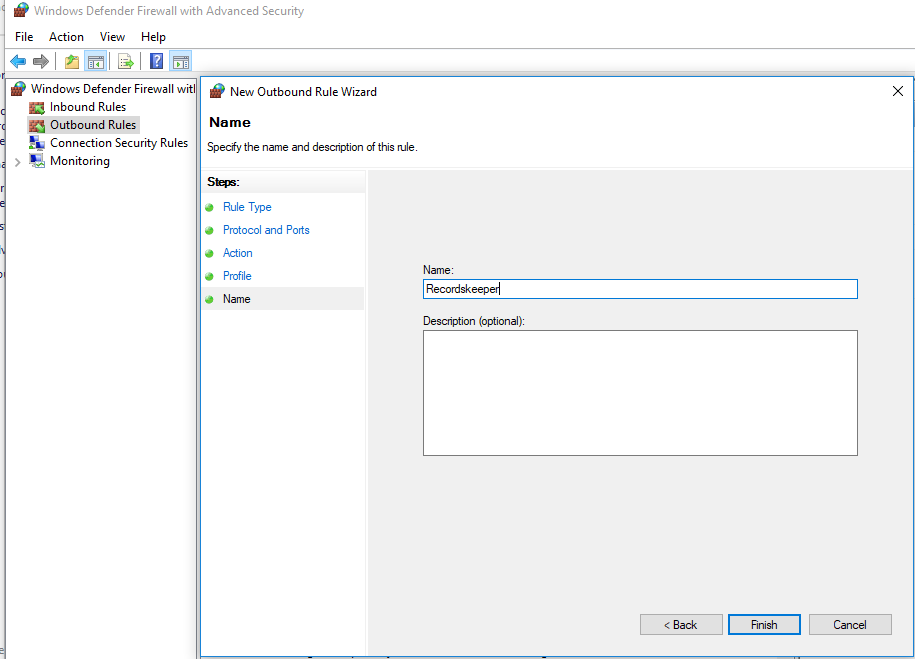
Step 5: Now choose a name for the created Outbound rule and then press Finish to complete the process of opening up the ports.
Note
If you want another RecordsKeeper node to connect to your node then you have to allow connections by making Inbound rules for the same. Follow the same procedure after selecting a new Inbound rule.
Note
Windows users now can go to the mining-permissions section.
Mining Permissions
Running RecordsKeeper on Windows
You will see the following message on your Windows command line terminal after you execute the command to connect to the RecordsKeeper blockchain.
Note
Windows users have to open a new command line terminal window for running the remaining commands.
RecordsKeeper Permissions
RecordsKeeper Testnet
The mining for RecordsKeeper Testnet is open to everyone, so when you connect to RecordsKeeper Testnet, you will receive all the permissions for your default address
RecordsKeeper Mainnet
For Mainnet, when your node gets connected, you will receive the permissions to connect, send, and receive. Now look for your default XRK address from the command given below, which will display your node’s wallet address. This address is your “default XRK address” or “public address” of the RecordsKeeper blockchain in which you will receive XRK tokens. To check the address, run the following command:
rk-cli recordskeeper getaddresses
Submit the following to receive Mining Permissions for RecordsKeeper Mainnet.
Note
Copy the above generated address and send it to us here .
Only after the RecordsKeeper team grants mining permissions to your node address will you be able to mine XRK tokens into your default address.
To retrieve the private key for your node address, run this command:
rk-cli recordskeeper dumpprivkey {default_XRK_address} #(input node_address without braces)
Note
Please store this private key safely. Losing it will result in the loss of XRK tokens.
After completing the above process, you can check for your node’s information (best block and synced block) by running the following commands:
rk-cli recordskeeper getinfo                 #(for synced block)
rk-cli recordskeeper getblockchaininfo       #(for best block)
Your node will sync with the best block, and then only your node can start mining and your balance will get updated with the mined XRK tokens.
If you have entered the wrong IP address, it will report this error:
Warning
Error: Couldn’t initialize permission database for blockchain recordskeeper. Probably rkd for this blockchain is already running. Exiting…
Please check the IP address and port properly to connect to the RecordsKeeper blockchain.
Note
If you have already created a wallet address and you want to add it as your miner address, then run this command from the command line terminal:
rk-cli recordskeeper importprivkey {private_key} #(include private key without braces)
Connecting to RecordsKeeper Blockchain after Permissions
Once the permissions for RecordsKeeper Mainnet have been granted, you can directly connect to the RecordsKeeper chain and see your mining progress. You can run the following commands to connect to the RecordsKeeper blockchain and view the mining address.
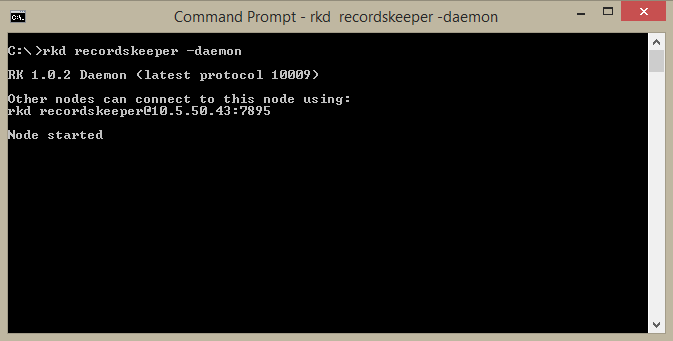
As the IP configuration was already stored with you when you initiated the connection, you can directly run the following command:
rkd recordskeeper -daemon
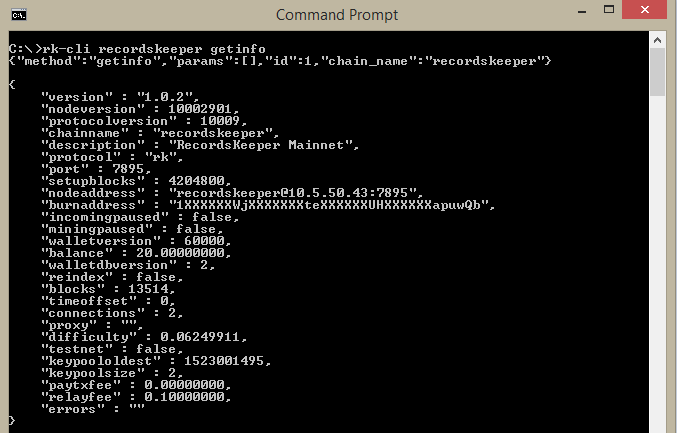
You can run the getinfo command or getaddressbalances command to see the balance in your node or the node address.
rk-cli recordskeeper getinfo
Note
You can view your balances in the balance output of the getinfo command.
OR
rk-cli recordskeeper getaddressbalances <Your Node Address Given for Mining>
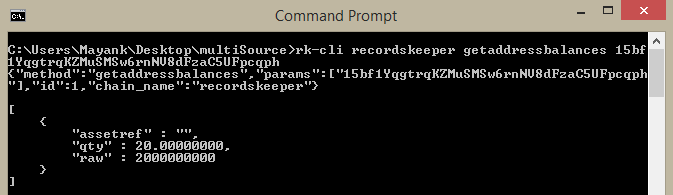
Note
Please do not use the address specified above. This address is only available for the demo purpose.
Stopping RecordsKeeper Blockchain
RecordsKeeper Mainnet
If you want to stop your RecordsKeeper node, you can use the following command from your command line terminal:
rk-cli recordskeeper stop
RecordsKeeper Testnet
Ifyou want to stop your RecordsKeeper-test blockchain node, you can use the following command from your command line terminal:
rk-cli recordskeeper-test stop